Creating Stunning Epoxy Stickers at Home
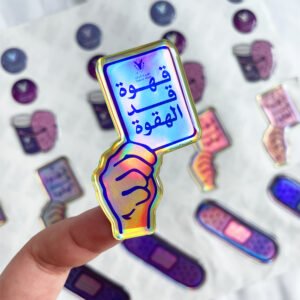
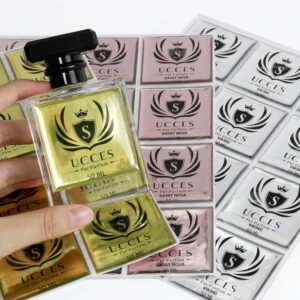
Epoxy stickers pair printed artwork with a clear, raised resin coating for a glossy, dimensional finish. Making custom epoxy stickers at home involves preparing your designs, carefully applying resin, and letting everything cure undisturbed. This article walks you through the process, plus ways to turn finished designs into bottle cap jewelry and magnets.
How do you make epoxy stickers at home?
To make epoxy resin stickers, start with adhesive-backed artwork, test whether it needs sealing, and apply a controlled layer of mixed epoxy over the printed face. Gently guide the resin toward the edges without letting it spill over, then protect the pieces from dust while they cure. Follow your resin manufacturer’s measuring, mixing, and curing instructions rather than assuming every product works alike.
Table of Contents
For your first batch, try a few simple circles instead of an entire sheet of intricate designs. Think of it as a practice run: you’re checking your artwork, coating technique, and workspace before committing to your favorite prints.

Gather your supplies before mixing
Clear the table and arrange everything within easy reach. Once the resin is mixed, you’ll have a limited working window, so cutting artwork and hunting for tools should already be finished. Product instructions specify that window and the conditions needed for curing.
Use this checklist to organize your setup:
Supply | What to check before starting |
|---|---|
Clear epoxy suitable for doming | Application guidance, mixing ratio, and cure schedule |
Printed adhesive-backed designs | Clean cuts, dry ink, and compatibility with resin |
Compatible clear-drying sealer | Whether your paper or ink needs protection |
Measuring containers and stir sticks | Suitability for the product’s measuring method |
Toothpicks or small applicators | Enough clean tools for spreading and adjustments |
Level protected tray and dust cover | Space to leave the batch undisturbed |
Protective equipment | Glove and eye-protection requirements in the safety data sheet |
The resin and artwork checks above follow manufacturer guidance; protective equipment should match the specific chemicals you’re using.
Make safety part of the setup
Uncured epoxy isn’t something to handle barehanded. Read the label and safety data sheet, provide the recommended ventilation, and wear suitable chemical-resistant gloves and eye protection. Epoxy components can irritate skin and cause allergic reactions; a low odor doesn’t establish that exposure is safe.
Keep the work area separate from food preparation, and keep children and pets away from uncured materials. Don’t improvise with extra heat or assume a basic face covering replaces ventilation. Follow the product’s exposure-control instructions, including any respiratory-protection requirements.
If resin contacts your skin, wash promptly with soap and water rather than solvents. Follow the manufacturer’s cleanup and disposal directions for contaminated tools and leftover material.
Prepare artwork before the glossy part
For a first set of custom epoxy stickers, choose designs you’ll enjoy repeating: initials, simple flowers, miniature illustrations, or bold geometric patterns. Print a test sheet and inspect it at the actual finished size. If a detail already looks cramped, simplify it before adding resin.
Paper and some printing inks need a compatible barrier coat because resin can soak into porous material or affect the image. Test your exact combination of artwork, sealer, and resin on a spare piece. Let the sealer dry completely before coating, and protect exposed paper edges as well as the printed surface.
Trim the designs neatly, leave their adhesive backing attached, and arrange them flat on your protected tray. Check that each piece stays flat rather than rocking or curling. Keep a labeled spare from each material combination so you can compare results after curing.
That little test batch is especially worthwhile when learning how to make epoxy resin stickers with home-printed artwork. Write down what you used; otherwise, a successful result can be surprisingly hard to repeat.
How do you make epoxy dome stickers with a smooth finish?
A smooth dome comes from controlled application: place resin near the center, gradually guide it outward, and stop before it overflows. The goal is a continuous raised coating, not the tallest possible bubble. Accurate mixing, a level surface, and protection during curing also matter.
Measure and mix precisely
Use the ratio printed on your resin’s instructions, including whether measurements are by volume or weight. Don’t substitute one method for the other or add extra hardener to speed things up. Mix for the specified time, reaching the container’s sides and bottom; use a second mixing container if the manufacturer requires it.
For your practice batch, prepare only what you can comfortably apply within the stated working time. Note the product name and mixing details beside your test designs. It’s a simple habit that makes troubleshooting less of a guessing game.
Build the dome gradually
Transfer a small amount of mixed resin onto the center of one sticker. Use a toothpick or small applicator to encourage it toward the outline, adding more only where coverage is incomplete. Check from a low angle so you can see the coating’s profile rather than judging only from above.
Work through this sequence:
- Start with less resin than you think you need.
- Guide it across the printed face without pushing beyond the perimeter.
- Inspect the outline for missed spots or developing overflow.
- Dislodge visible bubbles with a clean toothpick where practical.
- Stop adjusting once the coating is even and leave the piece level.
Controlled dispensing and careful edge work are preferable to flooding the artwork and trying to rescue it afterward. Follow your product’s bubble-removal guidance; don’t automatically reach for a torch on small stickers.

Cover and allow a full cure
Place a clean cover over the tray without touching the wet domes. Maintain the manufacturer’s recommended conditions and wait for the specified full cure before peeling, packaging, or assembling your epoxy resin stickers. A surface that feels firm isn’t necessarily fully cured.
Troubleshoot the test batch
Before changing everything at once, compare the failed piece with your notes. Start with the symptom and check the most relevant part of the process:
- Sticky or soft coating: Recheck the measuring method, ratio, mixing procedure, and curing conditions. Don’t treat a persistently tacky piece as finished.
- Dark patches in paper: Review the sealing test, including coverage around cut edges.
- Uneven dome or overflow: Check tray level and reduce the amount applied to the next sample.
- Dust or stray fibers: Inspect the cover and clean the surrounding workspace before another batch.
Manufacturer guidance identifies measuring and mixing errors, porous artwork, leveling, and dust protection as important checks. Change one variable per test so your next batch teaches you something useful.
Turn epoxy stickers into bottle cap jewelry
If you’re wondering how to make bottle cap jewelry with epoxy stickers, start by checking how a finished sticker fits inside your chosen cap. Dry-fit the design before attaching anything permanently, and plan where the hanging hardware will sit.
A practical assembly sequence is:
- Choose a clean craft cap without sharp or damaged edges.
- Prepare any hanging hole before adding the artwork.
- Secure the fully cured sticker inside the cap using suitable adhesive if needed.
- Attach a jump ring and necklace or earring finding.
- Let any assembly adhesive cure before wearing the piece.
Bottle cap jewelry can use punched holes and jump rings, while resin-coated images provide the decorative face. Follow the hardware and adhesive instructions for your particular assembly.
For a first project, try one pendant rather than a matching jewelry set. You can refine the placement and check how it hangs before repeating the design.
How do you make bottle cap magnets with epoxy stickers?
To make bottle cap magnets with epoxy stickers, secure a fully cured decorated sticker inside a cap, then attach a magnet to the cap’s back using an adhesive suitable for both materials. Allow the adhesive to cure before testing the magnet. Bottle cap resin projects can be finished as either jewelry or magnets.
Dry-fit the parts first and check that the magnet can contact the intended metal surface. Try a coordinated trio of initials, tiny landscapes, or kitchen-themed illustrations. Keep your first set small enough to compare the finished pieces closely.
Start small and repeat what works
Pick one design, make a few samples, and keep notes. Once you’re happy with the result, build a coordinated collection of custom epoxy stickers, pendants, or magnets. A repeatable process is a much better starting point than a crowded tray of experiments.